Embarking on the task of swapping out your Deutz engine fuel pump requires meticulous attention to detail and adherence to a comprehensive set of 14 key steps. Each stage in this process is crucial to ensuring the smooth operation and durability of your engine.
From safety measures to the final engine test after installation, every action plays a vital role in the successful replacement of the fuel pump. The complexities involved in this procedure highlight the importance of precision and care in maintaining and looking after your engine's fuel system.
Safety Precautions
Safety Precautions
To guarantee a secure working environment, it is imperative to adhere to stringent safety protocols when replacing the Deutz engine fuel pump. The fuel pump is a critical component of the engine that requires careful handling to guarantee optimal performance and safety. Prior to beginning any work on the fuel pump, it is vital to wear appropriate protective gear such as gloves and safety glasses to prevent any potential injuries. Moreover, it is crucial to make sure that the engine is turned off and adequately cooled down before initiating any tasks related to the fuel pump to avoid any accidents or mishaps.
When handling the fuel pump, it is significant to exercise caution to prevent spills and accidents that could lead to dangerous situations. Working in a well-ventilated area is also crucial to prevent the inhalation of harmful fumes emitted during the replacement process. Before restarting the engine after replacing the pump, it is advisable to double-check all connections and components to verify everything is properly secured and functioning correctly.
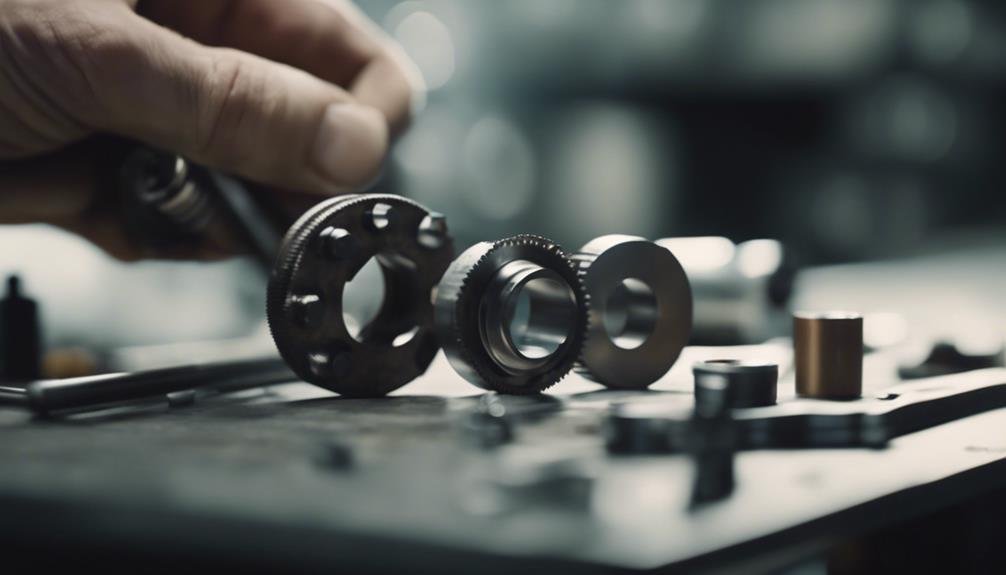
Gather Necessary Tools
Before starting on the fuel pump replacement process for your Deutz engine, it is important to make sure you have the necessary tools in place. From an adjusting pin for the control rod to an injection pump hold down pin, these specialized tools are vital for the successful completion of this task.
A detailed equipment checklist will help you gather all the required tools and parts before beginning the replacement process.
Tool Preparation
Tool Preparation
Consider equipping yourself with the necessary tools required for the precise replacement of your Deutz engine fuel pump to help a smooth installation process. An adjusting pin for the control rod is vital to guarantee proper alignment during the replacement. Investing in a Deutz workshop manual, priced at £125, will provide detailed guidance throughout the process.
Moreover, an injection pump hold-down pin, available for £45, assists in securing the new fuel pump effectively. Gathering these tools, along with other required parts, is critical for a successful installation. Following the specific tool preparation steps outlined in the Deutz workshop manual will ensure a seamless and efficient replacement of your Deutz engine fuel pump.
Equipment Checklist
Equipment Check List
A crucial step in preparing for the replacement of your Deutz engine fuel pump is to gather the necessary tools listed in the equipment checklist. For a successful Pump Installation, make sure you have an adjusting pin for the control rod, a Deutz workshop manual, and an injection pump hold down pin.
The Deutz workshop manual, priced at £125, is a valuable investment providing guidance specific to your engine model. Moreover, consider purchasing the injection pump hold down pin for £45 to aid in the installation process.
Different other tools and parts may also be required, so follow the correct sequence outlined in the manual and adhere to testing procedures meticulously to ensure the proper replacement of the fuel pump.
Locate the Fuel Pump
Locate the Fuel Pump
The fuel pump on a Deutz engine can typically be found mounted on the side of the engine block. When locating the fuel pump, follow these steps:
- Check the Engine Block: Start by examining the side of the engine block, where the fuel pump is usually positioned for easy access.
- Follow the Fuel Lines: Trace the fuel lines from the fuel tank towards the engine, as they will lead you to the fuel pump location.
- Look for Electrical Connections: The fuel pump will have electrical connections for operation, which can help in confirming its identity.
- Consider Surrounding Components: The pump is often situated near the fuel filter and injection system components, so inspect these areas for the fuel pump's presence.
Properly identifying the fuel pump's location is important for effective maintenance and replacement procedures on your Deutz diesel engine. Note that accessing the pump may require removing other engine parts to ensure clear visibility and safe replacement.
Drain the Fuel System
Drain the Fuel System
To effectively drain the fuel system of your Deutz engine, begin by locating and loosening the drain plug on the fuel filter housing using a spanner, making sure to place a container underneath to catch the fuel as it is released. This step is important for fuel system maintenance and troubleshooting, especially when dealing with fuel system contamination issues.
Open the drain plug slowly to allow the fuel to flow out steadily, ensuring a controlled release. It is necessary to drain the fuel system completely to avoid any leftover fuel causing complications during fuel system cleaning or upgrades. Once the fuel is fully drained, tighten the drain plug securely to prevent leaks and ensure the fuel system efficiency.
Proper disposal of the drained fuel is necessary, following local regulations to protect the environment. By following these steps, you can effectively drain the fuel system of your Deutz engine, setting the stage for further maintenance or repair tasks.
Remove Fuel Lines
Before proceeding to remove the fuel lines, it is important to make sure the engine has cooled down to prevent any potential injuries.
Utilize line wrenches for a secure disconnection of the fuel lines without causing any damage.
Remember to label each fuel line meticulously to aid correct reconnection once the fuel pump replacement is complete.
Disconnect Fuel Hoses
Disconnect Fuel Hoses
Prior to disconnecting any fuel hoses during the process of replacing your Deutz engine fuel pump, make sure complete depressurisation of the fuel system. Here are key steps to follow:
- Hose Inspection: Before removal, carefully inspect hoses for wear, damage, or leaks that may require replacement.
- Proper Labelling: Label hoses or take pictures to make certain correct reconnection when installing the new fuel pump.
- Fuel Spillage Prevention: Use caution to prevent any fuel spillage and follow safety protocols during the hose disconnection.
- Clamp and Fitting Check: Consider replacing hose clamps or fittings if they show signs of corrosion or deterioration.
Following these steps will help guarantee a smooth and successful fuel pump replacement process.
Label Fuel Lines
Before proceeding with the removal of fuel lines, make sure that each line is clearly labelled to aid proper reattachment during the fuel pump replacement process. Proper fuel line identification is important for troubleshooting and ensuring a smooth reassembly.
Implement proper labelling techniques such as using zip ties or masking tape to mark each fuel line distinctly. It is also beneficial to take clear photos of the fuel line connections and maintain a detailed diagram of the layout. These steps will assist in the correct reconnection of fuel lines during the replacement process, preventing mix-ups or incorrect connections.
Attention to detail in labelling will streamline the reassembly process and contribute to effective fuel system management.
Drain Fuel System
To initiate the process of draining the fuel system and removing the fuel lines, locate and carefully disconnect the fuel lines connected to the pump using appropriate tools to prevent any damage. Remember to place a suitable container beneath the fuel lines to catch any spilled fuel.
- Disconnect Fuel Lines: Use the appropriate tools to disconnect the fuel lines securely.
- Ensure Safety: Adhere to safety precautions to prevent spills and fire hazards.
- Cap Fuel Lines: Once removed, cap or seal the fuel lines to maintain system integrity.
- Proper Disposal: Dispose of the drained fuel properly to lessen environmental impact and maintain fuel efficiency.
Following these steps will help in maintaining the fuel system, preventing contamination, ensuring system integrity, and reducing environmental impact.
Disconnect Electrical Connections
Disconnect Electrical Connections
Upon commencing the replacement process of the Deutz engine fuel pump, the initial step entails disconnecting the electrical connections to confirm safety and prevent any potential electrical mishaps. Prioritise electrical safety by confirming all wires are correctly identified, labelled, and disconnected. This practice not only avoids confusion during reassembly but also minimises the risk of errors.
Exercise caution and adhere to safety protocols when handling electrical components to prevent damage or injury. Take note of the specific connections and their positions to guarantee the correct reinstallation of the new fuel pump. Before completing the replacement process, verify that the electrical connections are secure and correctly attached to the new fuel pump. Following these meticulous procedures will streamline the reassembly and ensure successful testing procedures.
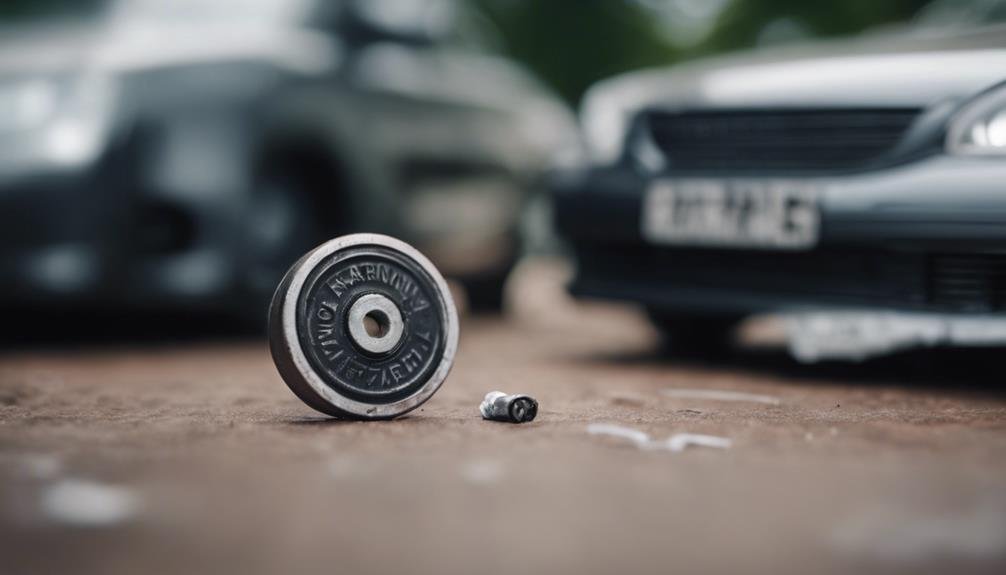
Unmount the Fuel Pump
To properly unmount the fuel pump, begin by carefully removing the fuel pump from its mounting position. Ensure the fastening bolts are loosened symmetrically to prevent any damage.
Next, disconnect the fuel lines from the pump while using appropriate tools to securely hold the pump during this process.
Remove Fuel Pump
Detaching the fuel lines from the pump using a spanner is the initial step before removing the bolts that secure the pump to the engine block. Follow these steps to successfully remove the fuel pump:
- Disconnect Fuel Lines: Use a spanner to detach the fuel lines from the pump carefully.
- Unbolt Pump: Remove the bolts that secure the pump to the engine block.
- Pry Pump Away: Gently pry the pump away from the mounting surface once the bolts are removed.
- Beware of Fuel: Be cautious of any remaining fuel in the pump and handle it appropriately.
Remember to clean the mounting surface thoroughly after removing the pump to guarantee a clean workspace for further inspection.
Disconnect Fuel Lines
After successfully removing the fuel pump from the engine block, the next step in the process is to disconnect the fuel lines securely using the appropriate tools. Proper fuel line handling is critical to avoid damage and guarantee a smooth reassembly process. It is vital to label each fuel line accurately to ease easy reconnection later on. This step not only saves time but also reduces the chances of errors during reinstallation. Moreover, adhering to fuel system safety precautions is paramount to prevent any accidents or mishaps. Always follow the manufacturer's guidelines meticulously to guarantee a successful fuel pump replacement process.
| Fuel Line | Labelling | Safety Precautions |
|---|---|---|
| 1 | YES | Follow guidelines |
| 2 | YES | Use appropriate tools |
| 3 | YES | Check for leaks beforehand |
| 4 | YES | Have a fire extinguisher nearby |
| 5 | YES | Dispose of spilled fuel properly |
Secure Removed Pump
Secure the removed fuel pump by utilising specialised tools designed for this purpose, ensuring it is stored in a clean and safe environment to prevent any contamination or damage.
When securing the pump, follow these steps:
- Use special tools for securing the pump to prevent any mishandling.
- Ensure the storage area is clean and free from any contaminants that could affect the pump.
- Remove the fastening bolts symmetrically to avoid any strain or damage to the pump.
- Keep note of the pump's original position to help with smooth reinstallation.
Inspect for Damage
Inspect for Damage
Upon examination of the Deutz engine fuel pump, carefully scrutinise the fuel pump body for any indications of cracks, leaks, or wear that may compromise its functionality. Damage assessment is critical at this stage to determine the repair options needed.
Look for any corrosion or damage on the pump housing, as this can impact the general performance of the fuel pump. Moreover, inspect the pump mounting bolts to make sure they are tight and properly aligned, as any looseness can lead to inefficiencies in the fuel system.
Preventative maintenance is key to ensuring fuel pump longevity, so identifying and addressing any issues promptly is necessary. Corrosion prevention measures should be taken to maintain fuel system health and prevent future damage.
Check the fuel lines connected to the pump for obstructions or blockages, and verify the condition of the pump gasket or seal for any signs of deterioration or leaks. Regular inspections and maintenance can help avoid costly repairs and downtime.
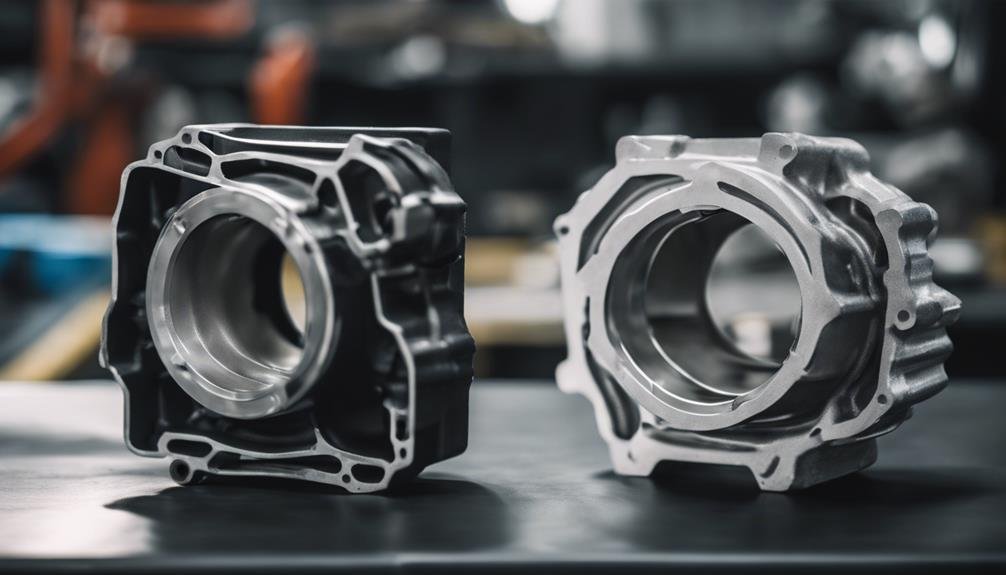
Install the New Fuel Pump
Inspecting the fuel pump body for any damage is crucial before proceeding with the installation of the new fuel pump on your Deutz engine. Once you have ensured the pump is in good condition, follow these steps for a successful installation:
- Pump alignment, hole positioning: Align the new fuel pump correctly by matching the holes on the pump with the corresponding ones on the engine mounting surface.
- Rack compression, free movement: Prior to installation, press on the fuel rack to ensure it moves freely. Slightly compress the rack to ease proper alignment of the holes during installation.
- Crankshaft rotation, tappet positioning: Rotate the crankshaft to position the tappet correctly for the new pump. This ensures that the components are in sync for optimal performance.
- Secure installation: Torque down the injection pump bolts securely and remove any holding pins. Lastly, plug the timing hole securely to complete the installation process.
Following these steps diligently will help you replace your Deutz engine fuel pump effectively.
Reconnect Electrical Connections
Before reconnecting the electrical connections, it is important to make sure they are clean and free of any dirt or debris that could impede proper connectivity.
Use the appropriate wiring diagram as a guide to accurately reconnect each electrical connection.
Once connected, double-check the fastening of the connections to guarantee a secure fit before testing the functionality to make sure proper operation.
Check Wiring Connections
Check Wiring Connections
After replacing the fuel pump on your Deutz engine, it is vital to meticulously guarantee that all electrical connections are securely reconnected to ensure optimal performance and safety. When checking the wiring connections, follow these key steps:
- Inspect for Damage: Look for any loose or damaged wiring that may impact the fuel pump's performance.
- Check Harness Condition: Examine the wiring harness for signs of wear or corrosion that could lead to electrical issues.
- Verify Configuration: Make sure the wiring connections match the specific configuration required for your Deutz engine model.
- Ensure Proper Reconnection: Properly reconnecting the wiring is crucial to ensure the new fuel pump functions correctly and safely.
Secure Electrical Connections
Ensuring all electrical connections are securely reconnected is important for the proper functioning and safety of the newly replaced Deutz engine fuel pump. When securing electrical connections, employ electrical troubleshooting techniques to identify any potential issues.
Inspect the wiring harness connection points meticulously to prevent electrical faults that could affect the fuel pump's performance. Confirm that all connections are snugly attached to avert any malfunctions that may arise from loose wiring.
Adhering to wiring maintenance tips will help maintain the integrity of the electrical connections over time. Prioritise connection safety measures to safeguard the general operation of the Deutz engine fuel system.
Test Electrical Functionality
To thoroughly assess the functionality of the newly replaced Deutz engine fuel pump, it is significant to meticulously test the electrical connections for proper voltage and continuity using a multimeter. When reconnecting the electrical components, make sure all wires are securely attached and free from damage.
Follow these steps to verify the electrical functionality:
- Test Voltage: Measure the voltage at the fuel pump to make sure it meets the manufacturer's specifications.
- Verify Continuity: Check for continuity in the electrical connections to confirm a complete circuit.
- Inspect Earthing: Ensure all components are properly earthed to prevent electrical issues.
- Use Multimeter: Utilise a multimeter to accurately measure voltage and check for continuity in the electrical system.
Reattach Fuel Lines
When reattaching fuel lines to the Deutz engine fuel pump, it is important to use new copper washers to prevent leaks and guarantee a secure connection. Before attaching the fuel lines, it is vital to inspect them for any signs of wear or damage. Proper alignment of the fuel lines is necessary to ensure a leak-proof connection. Once aligned, securely tighten the fittings following the specific torque specifications to prevent any leaks. Double-check all connections to confirm they are tightly sealed before starting the engine to avoid any potential hazards.
| Step | Procedure |
|---|---|
| 1. Inspect Fuel Lines | Check for wear or damage on the fuel lines before reattaching them to the fuel pump. |
| 2. Align Fuel Lines | Align the fuel lines properly to ensure a secure and leak-proof connection to the pump. |
| 3. Use Copper Washers | Use new copper washers when reattaching the fuel lines to prevent leaks and ensure security. |
Prime the Fuel System
After reattaching the fuel lines to the Deutz engine fuel pump, the next crucial step is to prime the fuel system to ensure proper fuel flow and eliminate any air bubbles.
To successfully prime the fuel system, follow these steps:
- Fill the Fuel Filter: Start by filling the fuel filter with clean diesel fuel to guarantee a smooth flow through the system.
- Use a Pump: Utilise a hand pump or electric pump to prime the system until fuel flows steadily, indicating proper operation.
- Bleed Air: Open the bleed screw on the fuel filter housing to release any trapped air in the system, ensuring optimal performance.
- Eliminate Air Bubbles: Continue priming the system until all air bubbles are eliminated from the fuel lines, guaranteeing a fully operational fuel system.
Check for Leaks
Upon completing the priming process for the fuel system, the next critical step is to meticulously inspect the Deutz engine fuel pump for any indications of leaks or damage.
To effectively check for leaks, start by examining the fuel pump gaskets for any signs of wear, tears, or damage. Also, inspect the surrounding area for fuel stains, wet spots, or any visible signs of leakage.
Keep a close eye out for puddles or drips of fuel underneath the pump, as these are clear indicators of a leak. Monitoring the fuel levels for sudden decreases can also help in detecting leaks early on.
Addressing any leaks promptly is crucial to prevent potential engine damage and ensure optimal performance. Implementing preventive measures such as regular fuel pump maintenance and thorough fuel system inspections are essential for maintaining the integrity of the engine.
Test the Engine
To evaluate the effectiveness of the fuel pump replacement, conduct a thorough test on the engine by checking for proper fuel delivery and pressure. After replacing the fuel pump, it is important to make sure that the engine performs optimally. Here are key steps to test the engine:
- Check Engine Performance: Start the engine to verify that it starts easily and runs smoothly without any hiccups. Monitor for any irregularities in the engine's operation.
- Assess Fuel Pressure: Use a pressure gauge to measure the fuel pressure. Compare the readings to the manufacturer's specifications to ensure that the new fuel pump is delivering the correct pressure.
- Listen for Abnormal Noises: While the engine is running, pay close attention to any unusual noises such as knocking or whining. These could indicate issues with the fuel pump installation.
- Inspect for Leaks: Carefully examine the engine for any signs of leaks or irregularities in fuel flow. Address any leaks promptly to prevent potential hazards and ensure the proper functioning of the engine post-replacement.
Conclusion
Craft a Vivid Conclusion
In conclusion, by meticulously following the 14 key steps outlined for replacing your Deutz engine fuel pump, you are ensuring the smooth operation of your engine's fuel system. From safety precautions to testing the engine, each step plays a vital role in the successful replacement process, guaranteeing optimal performance of your Deutz engine. Remember, adherence to all instructions and guidelines is paramount to maintaining the efficiency and reliability of your engine.
Invoke Action with a Personal Touch
Feeling unsure or overwhelmed? Reach out to Estorf Teile for guidance and support. Consider us your friend in the world of engine maintenance, ready to lend a helping hand whenever you need it.
Guide Towards Further Learning
Curious for more knowledge about Deutz Parts? Contact us for any questions you may have, and let's explore the world of engine components together. Contact us now to satisfy your curiosity and deepen your understanding.
Emphasise Key Terms
Ensure the smooth operation of your Deutz engine by following the 14 key steps for replacing your fuel pump. Trust in the process and maintain the efficiency of your engine for optimal performance.
Adhere to British English Standards
Remember, when it comes to maintaining your engine, following the correct procedures is crucial for its longevity and effectiveness.